It’s almost Winter here at The Grand Ole Apiary, which means collecting up the last of our warm weather produce, and tucking the garden in for the cold. For us, it is time to harvest and preserve the last of our annual herbs, collect the last green tomatoes for yummy relish, and….drum roll…harvest and preserve pumpkins!
We love growing pumpkins. They really are one of the most rewarding vegetables one can grow in their cottage kitchen garden.
For very little effort, you will have pumpkins coming out your ears. I find with clever positioning, you can have all the pumpkins you could want with very little space too!
Let me show you how easy it is to grow, harvest and preserve pumpkins in your own cottage kitchen garden.
Grow your pumpkins
Pumpkins are super easy to start from seed. In fact, we always get at least one growing from our compost heap. They are easily the best seed to let kids start, as they sprout readily. They have decently strong stems and great big leaves that are fairly resistant to kids little grabby hands. It really is as simple as popping the seeds about an inch under some seed mix, and keep moist (not too wet though). Once they have one set of true leaves, they can be planted out.
How long does it take to grow a pumpkin?
Pumpkins are planted in Early Spring, and harvested in Early Winter.
Pumpkin seeds should be started as soon as the weather looks like warming up. Once your frosts have finished, you can start your seeds directly in the ground. If you started seeds indoors, you can put them in the garden when your days begin to warm up a little. Pumpkins are very hardy plants, but are susceptible to mildew if the leaves stay damp for days at a time.
Growing pumpkins vertically
We like to plant ours near a pumpkin trellis, and train them upwards. Growing pumpkins on a trellis saves a LOT of space. If you don’t have a trellis, fence or wall, you can try to train them along a fence line, or a border. Just know that left to their own devices, they will take over any area you let them. One plant will usually provide at least 3 – 4 pumpkins.
Growing pumpkins in containers
Many people are surprised to learn that pumpkins do great in containers! You will need a sizeable one though, and wider is better than deeper. Pumpkins like to send their roots sideways. You could even pop a couple of plants straight into a compost bin if you leave the lid off!
Pollination
Once you see flowers begin to appear – the fun starts! Pumpkins have two types of flowers: male and female.
The male flowers will look like ordinary flowers – one long skinny stem with a flower on the end.
The female flowers will look similar, but will be shorter. The flower will have a small round ball shaped base – sort of like a baby pumpkin. Guess what that baby pumpkin looking thing is?? Yep! A baby pumpkin! Could it be any cuter?
Now, in order for your little baby pumpkin to grow into a big strong pumpkin, that flower needs to be fertilised. This can happen naturally, usually with bees, butterflies or other pollinators. You can keep an eye on your baby pumpkins and see if this is happening or not. If not, the little pumpkins will die off with the flower, at about golf ball size. If this happens a few times to you, you can think about hand-pollinating your flowers.
Hand-pollinating (AKA Sexy time)
I sometimes stalk my vine in the afternoon, to check if there are female flower buds that look like they will open the next day. If there are, I aim to be there about mid morning, so the flower has opened, but not dried out too much.
Pick yourself a male flower. Gently and carefully peel back and remove the petals as much as possible, without knocking too much pollen off the stamen. Now, insert that stamen into a female flower’s pistil. If you remember that you are creating a baby here, you should instinctively know where to put that stamen! But in case you don’t – here’s a great site with some very detailed instructions and pictures.
Don’t be surprised if you feel a little weirded out when doing this. You feel weirded out because it’s weird! But trust me, it is very effective!
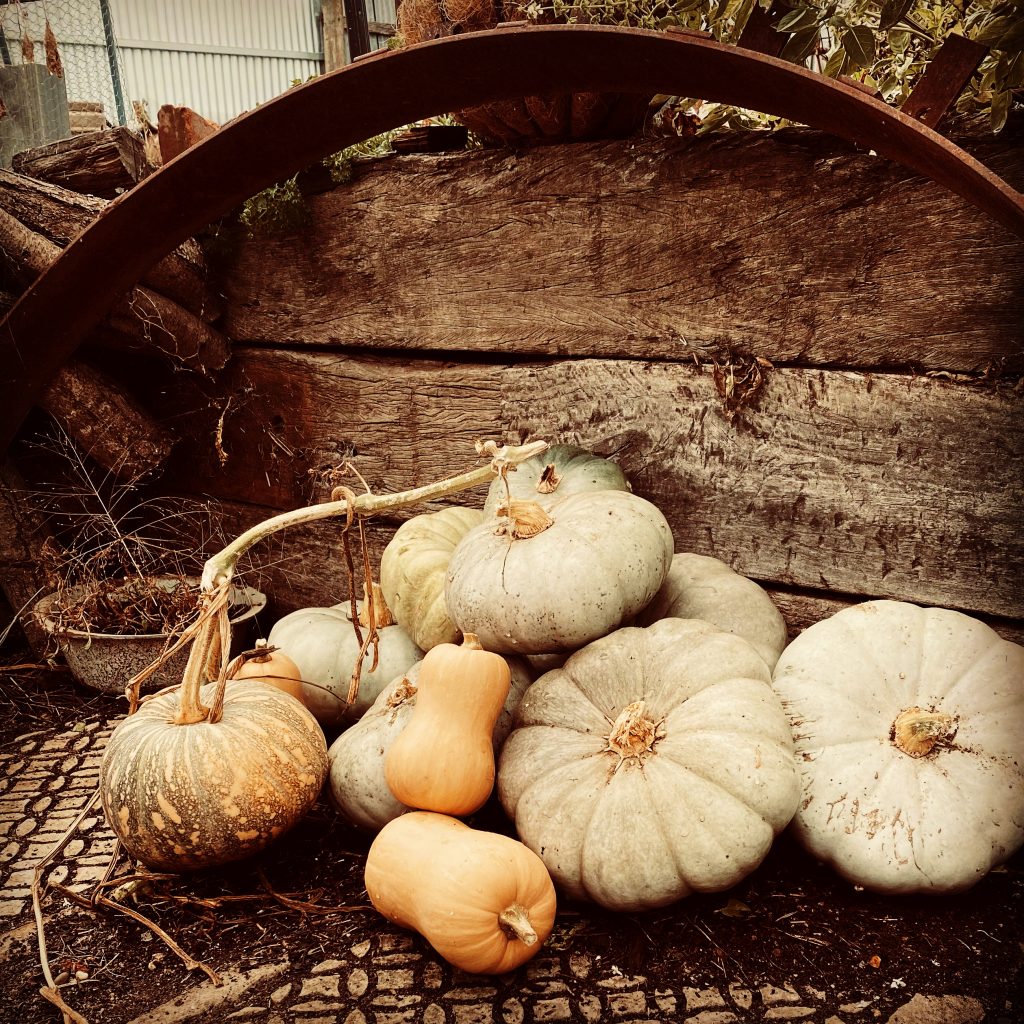
And now, you wait! Pumpkins can be left on the vines until the vines are completely dead. In fact, you will get nice tough skins on your pumpkins by doing so! Harvest after the first good frost is the general rule in our area.
Harvesting your pumpkins
Once your vines have all died off, and the cold weather is setting in, you can collect up all your lovely pumpkins.
Cut the stems away (leaving about 3 inches of stem attached) and store your pumpkins somewhere cool and dry. I place mine on their sides, in case of condensation etc – I don’t want any moisture settling around the stem. Some folk say to store your pumpkins on top of a shed or similar for a few weeks after harvesting, to toughen the skins. I’ve had pumpkins rot very quickly after doing this, so I don’t do it any more. I store them immediately in a cool dry place, and I have had pumpkins still in storage from the previous year when harvesting the current year!
Preserving your pumpkins
We aren’t just here to learn how to grow & harvest pumpkins are we? We are here to learn how to grow, harvest and preserve pumpkins! The simplest and most obvious method of preserving pumpkins, is to keep them stored in their cool, dry place. They will last a very long time like this. If you notice a pumpkin developing a blemish, use that one next. Very simple!
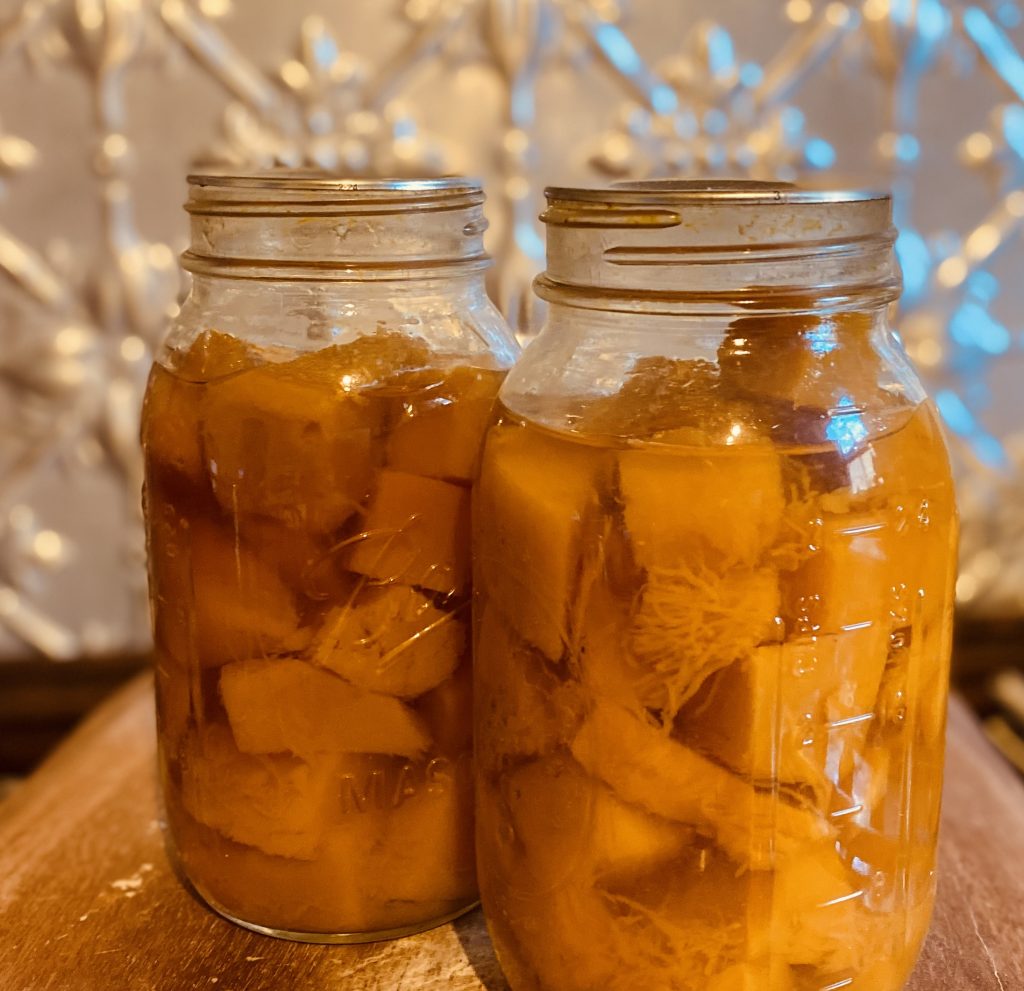
Here at The Grand Ole Apiary, we like to also can some of our pumpkins. There is currently only one approved method of canning pumpkins – they must be diced at 1 inch square and pressure canned, as they are a low acid food. Canning of pureed pumpkin is not yet approved. That’s ok though – we find that during the canning process, the pumpkin softens a lot anyway, so pureeing is an easy as opening the jar, draining the water, and mashing. It is unbelievably convenient to have a jar of pre-diced and cooked pumpkin on hand. Aside from classic pumpkin soup, we regularly toss into pasta sauces and risottos, spread on a tray and bake, or add to vegetable frittatas. We call it old fashioned meal prepping!
It’s best to follow an approved method from a trusted source when canning. My go-to for reliable canning advice is here.
So there you have it!
I hope you take my advice and add pumpkins to your cottage garden. You really won’t regret it!
This post contains affiliate links, which means I make a small commission at no extra cost to you.
Leave a Reply